Skip to content Skip to cookie consent
Skip to content

Tools and guides

Water safety

An introduction to water safety planning

2023 Available in English, Spanish, French and Portuguese

A group of young people gather around a community water pump and a girl wearing a pink skirt and shirt carries a large bowl on her head

Community members in Burkina Faso collect water from a village water pump. Photo: Jonas Yameogo/Tearfund

A smiling Brazilian woman collects water from a running tap fixed to a red brick wall.

From: Safe drinking water - Footsteps 120

How to value, look after and ensure the safety of drinking water

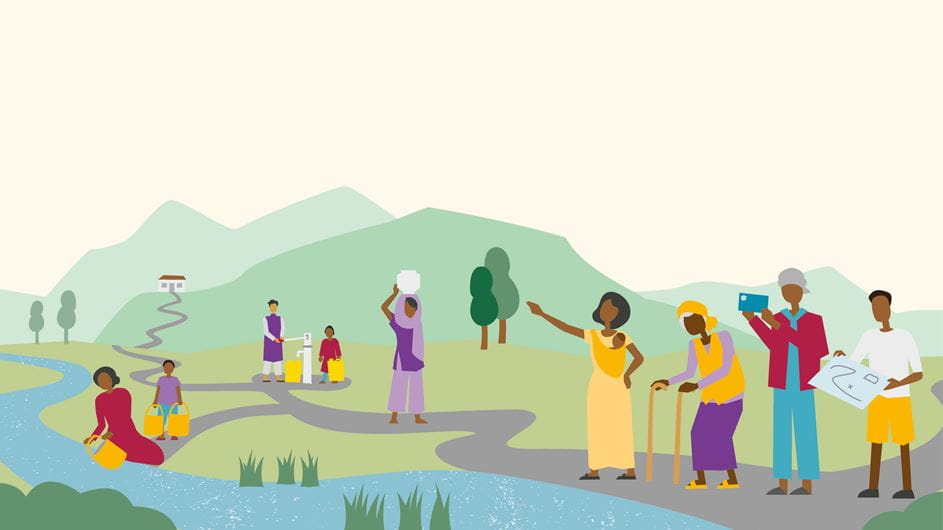
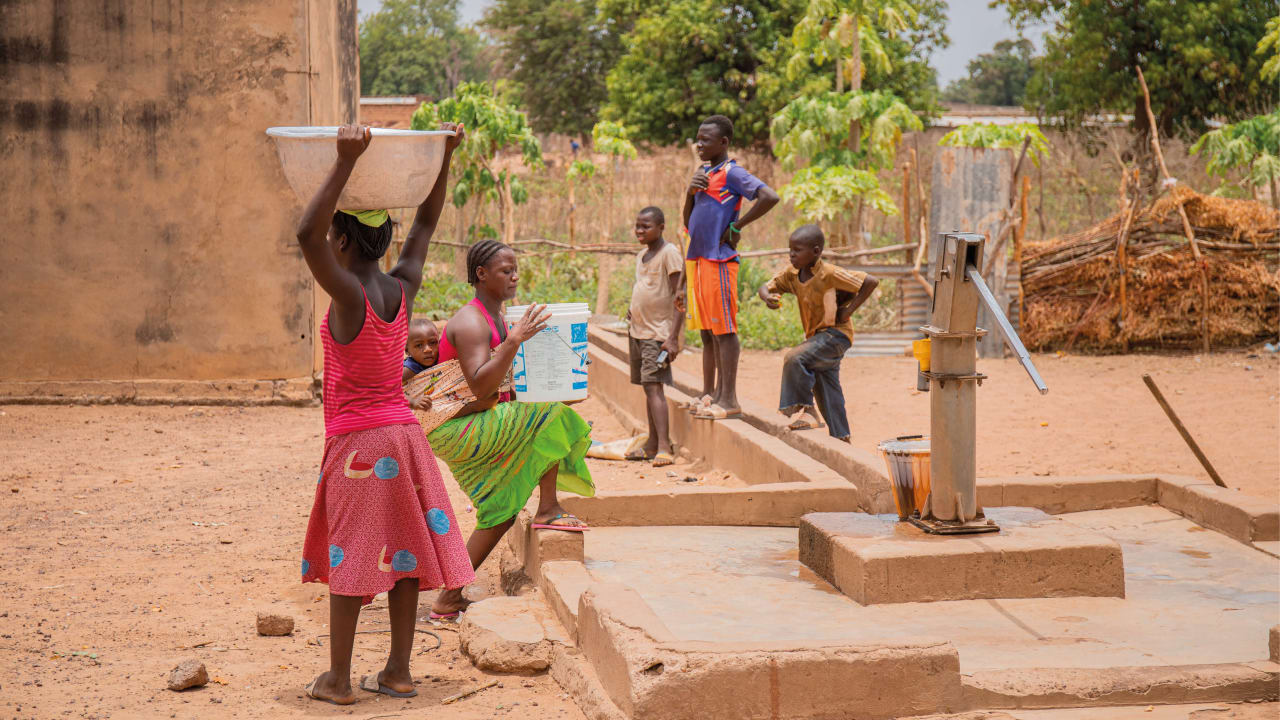
Every drop of water that we drink travels from a catchment area (eg hills and forests), through a source (eg a spring) to the place where it is used (eg a home). This is called the water supply route. 

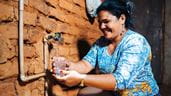
Along the way it might be treated, stored, pumped, piped or carried in a container. 

Contaminants that make water unsafe to drink, such as bacteria, viruses or harmful chemicals, can enter at any point along the water supply route. 

Water safety plans

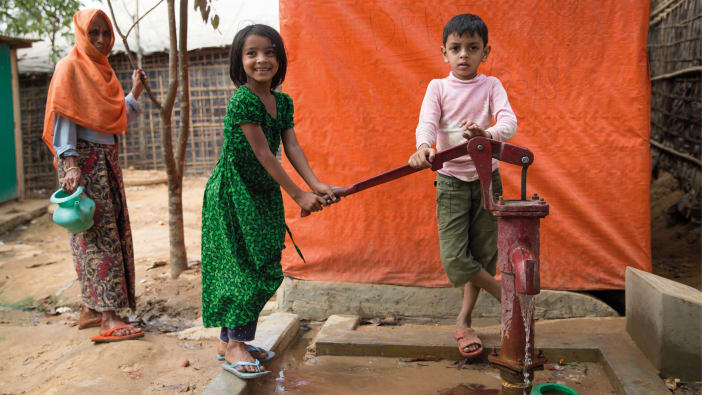
Testing can reveal if water is contaminated but it cannot identify where it happened. For example, well water may be tested and found to be safe, but if it is carried in a dirty container or left uncovered in the home, it may no longer be safe. 

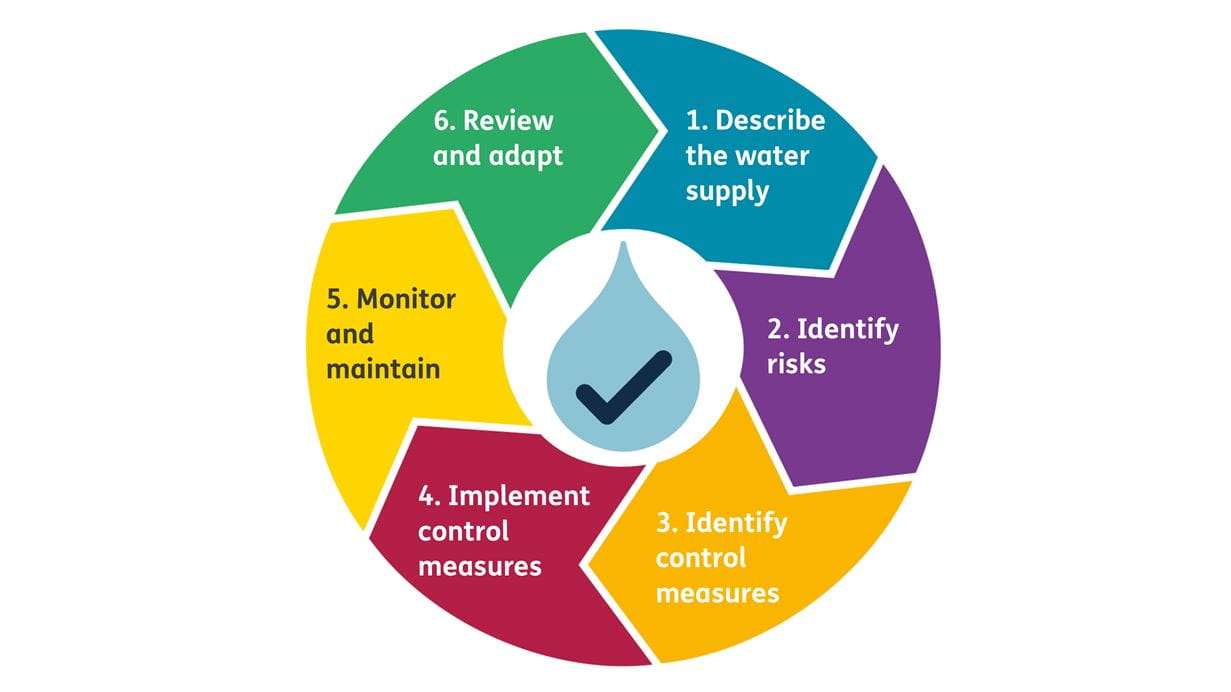
Water safety plans were launched by the World Health Organization in 2004 to help communities prevent contamination at any point in their water supply route.

A water safety plan identifies:

  • risks to safe drinking-water supply and
  • preventative measures that need to be put in place to stop contamination from occurring.

A water safety plan can be used for any type of water supply: rural or urban, new or existing. 

The plan should be integrated into the day-to-day operation, management and maintenance of the water supply and should be regularly checked and revised to ensure that it remains effective and up to date. Regular water-quality tests can help to check if the plan is working. 

Before developing a water safety plan, community members need to agree on targets, for example: ‘total days of diarrhoea in children under five will be no higher than three per month’. They can then work through each of the steps below with these targets in mind.


Other languages

How to develop a water safety plan

Developing a water safety plan consists of six steps. These steps are designed to be repeated, so the whole process can be viewed as a cycle.

It is important to ensure that as many people in the community as possible are involved in working through these steps: men, women, young people and children. 

Elderly people and people with disabilities might access water in different ways to other community members, so make sure that they are included in the conversations.

A diagram with blue, purple, orange, red, yellow and green sections illustrates the six key steps when developing a water safety plan

The six steps involved in developing a water safety plan

  1. Describe the water supply

    Using participatory activities such as a transect walk (see below) and mapping, investigate and describe your water supply route from source to use. As you describe it, you will become more familiar with the system and different things that could affect water quantity and quality.

    You can use photos, videos, drawings or words to describe the different parts of your water system.

  2. Identify risks

    Identify what could go wrong at each stage of your water supply route. Think about both current and potential contamination risks. For example, the risks associated with open defecation near an unprotected spring.

    Work together to answer these questions:

    • What could go wrong with our water supply system, increasing the risk of contamination?
    • How and why might it go wrong?
    • At what times and where might it go wrong?
    • What would be the consequences of it going wrong?
    • What is already being done to prevent it from going wrong?
  3. Identify control measures

    Think about what needs to be done to reduce the risk of contamination at any point in your water supply system. For example, you may need to put a livestock fence around a tap stand or make sure that water is collected in clean containers.

    Once you have a list of control measures, discuss which solutions will be the most effective and easiest to carry out. Prioritise the ones that will have the greatest impact. Decide who will do the work, and when.

  4. Implement control measures

    Put in place the new control measures and monitor and maintain existing water-protection practices.

    If you have limited resources and cannot implement all the control measures at once, draw up a step-by-step plan for how you will make the changes as resources become available.

  5. Monitor and maintain

    Establish systems to monitor and maintain a safe water supply including regular water-quality testing.

    Establish procedures for what to do if there is a contamination incident or emergency, eg flooding. Consider: who should be notified; who may need help to respond, such as older people and people with disabilities; how messages will be passed on quickly (eg radio broadcasts and text messages); which alternative safe water supplies can be used.

  6. Review and adapt

    Document your water safety plan so everyone can confidently follow the correct procedures.

    To ensure that the water safety plan is effective and up to date, regularly review what is working well and what needs to be changed.

Illustration of community members investigating their water supply route

Developing a water safety plan starts with investigating your water supply route from source to use

Transect walk

Involving as many members of your community as possible, walk a route through your local area, visiting places connected with your water supply and water quality. For example: sources; transport routes; water points (wells/ handpumps/ tap stands); storage areas; markets; livestock-watering sites; drainage courses; waste-dumping sites; open defecation areas. It can be helpful to take photographs or videos during the walk.

With a facilitator, describe your water supply route and discuss places where water could become contaminated.

As a group, you may wish to draw a map of your water supply route (on paper, or on the ground) using symbols or objects to illustrate the different parts of the route and contamination risks.

Share this resource

If you found this resource useful, please share it with others so they can benefit too.

Subscribe to Footsteps magazine

A free digital and print magazine for community development workers. Covering a diverse range of topics, it is published three times a year.

Sign up now - Subscribe to Footsteps magazine

Cookie preferences

Your privacy and peace of mind are important to us. We are committed to keeping your data safe. We only collect data from people for specific purposes and once that purpose has finished, we won’t hold on to the data.

For further information, including a full list of individual cookies, please see our privacy policy.

  • These cookies are necessary for the website to function and cannot be switched off in our systems.

  • These cookies allow us to measure and improve the performance of our site. All information these cookies collect is anonymous.

  • These allow for a more personalised experience. For example, they can remember the region you are in, as well as your accessibility settings.

  • These cookies help us to make our adverts personalised to you and allow us to measure the effectiveness of our campaigns.